Nate was a way in Michigan last week presenting at a conference, because he's awesome and smart like that. While he was gone, I made the most of my alone time in the evening and worked on a project that I have been so excited about for quite some time.
Let me start by saying that I have pretty much come to terms with the fact that I am not a creative person. I basically have zero original ideas. I don't have that gift of being able to look at something and see beyond it to what it could be. But... I
am pretty good at looking at other people's creative ideas and saying "yeah, I like that". I am also pretty good at following step-by-step instructions on how to recreate that idea.
A while back while browsing Pinterest, I came across
this photo wall and fell in love.
With everything from the scalloped frames to the yellow painted table. I started to think, "I could totally do that with a cute dresser and use it for art storage, and then use the frames to display the kids' art" So I started browsing the web for images of yellow dressers to copy and came across this one:
I. Fell. In. Love. It just spoke to me and I knew I had to have it. I thought about just buying it from the
Etsy shop that was selling it. It wasn't
that expensive, but it was in Chicago and shipping was way too steep for me. So I started to think, well, maybe I could do this myself. But space was an issue, and I didn't know if I could do something like this in my apartment, or if I would have to go to a friend's in Westchester to do it. I worked it out with a friend to do it at her house just in case. I started searching the web for tutorials, and found so many different options, it was overwhelming. How was I supposed to know which one was the best method? The most fool proof? If it was going to give me the look I wanted? I had been convo-ing the shop owner and decided to be brave and ask her how she did it, knowing that this was her creation and thinking she probably didn't want tons of people just copying her ideas. Thankfully, she was generous enough to suggest a link for a
tutorial and she even gave me the exact brand and color of paint she used (Solar Fusion by Behr). So nice. Then I started scouring Craigslist and E-bay to find the perfect dresser at the perfect price. I was pretty picky, (I really just wanted something that looked
exactly like the one in the picture, was this too much to ask?!?) so it took a while to find one.
But find one I did. It was
exactly what I wanted, but I still really liked it. I found it on Craigslist, for $20! Hard to beat that. It took us forever to coordinate a time to go and pick it up
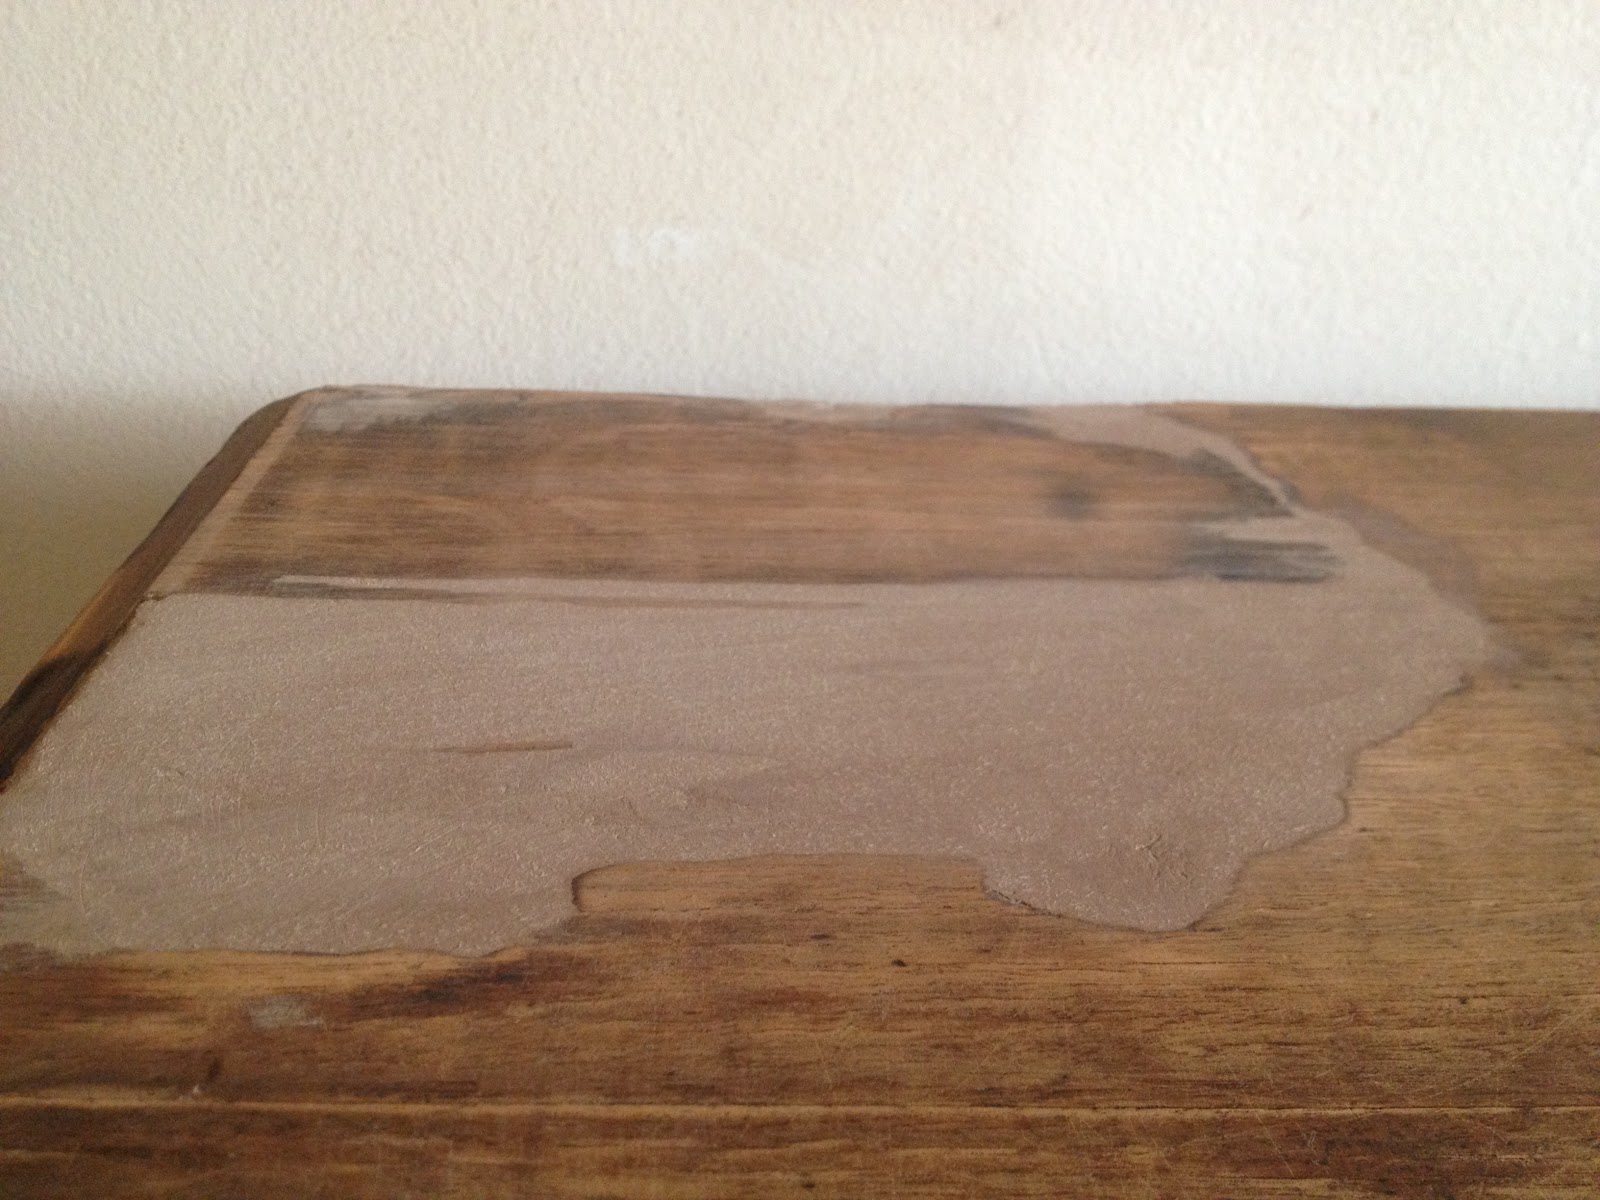
all the way over on the upper east side, and when we finally did, I was a little disheartened by the shape it was in... the drawers were falling apart, and there were quite a few chipped areas that were going to need to be patched. But for $20, I figured I could make it work. I took it home (after deciding that since I wasn't using spray paint, I could make it work in our new apartment) and got to work wood gluing and nailing the drawers together, sanding and cleaning it and patching up all the bad areas with wood filler, and sanding some more. Fixing the drawers ended up being the easiest and fastest part of the whole thing. All of this was over the course of a couple weeks. Finally it was ready to paint.
I waited until the kids were in bed and got to it. Of course it took me way longer than I thought it would, and my back was killing by the time I was done, and I wasn't even "done" yet. I let it dry overnight and in the morning I got to work on sanding and distressing it, which was the part I was most nervous about... I had no idea what to expect. It actually ended up being the funnest part. I loved sanding it and having the paint come off where it naturally would, and then on the areas that I wanted a little more wear, I went back and put a little more elbow grease into it. I was surprised by how much the sanding changed the paint color, but in a good way. It made it look less "crafty" and homemade, and it made the paint look less thick. After a few texts to my mom and sisters to make sure the sanding looked just right, I did the stain, which I was a little nervous about too. But I decided to trust the tutorial lady, who said that this is the step that most people miss, that really makes it look amazing. So I painted it on, wiped it off, and voila! It
did look amazing! I couldn't believe what a difference it made, especially on the sanded edges, it really made them pop. It does change the color of the paint a little bit, but again, in a good way. It gives it more character and depth and really makes is look like it's been worn over a long period of time. I seriously love it. I still can't get over how good it looks. I feel like a total professional! ;)
After:
I asked Asher if he liked my new dresser and he said "no, I don't like how it's all old, I only like it new", as in before I distressed it. Well I like it, and that's all that matters. ;) I actually did go back and forth on whether or not to distress it, because I really do love the nice clean look as well, but I really had my heart set on having a weathered look for this piece, and I am so happy with how it turned out.
The frames are coming along, but I keep changing my mind about how I want it to look and what I want to put on the dresser, but it's almost there. I will post a picture when it's all done.